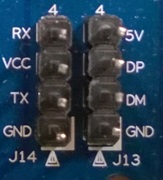
The four holes on the left are the UART port (the ones of the right
are USB endpoints), the router makes made this easy for us as the pins
are labelled. To actually read the data, we need to connect these to a
USB receiver and then we can talk directly to the console of the router.
To make this easier the first step is to solder some header pins directly to the board, these can be seen below. Note, I’m not very good at soldering, so I won’t show the underside : )
Now we can wire this to a USB to UART module. These are quite easy to find and cheap, mine cost me less than £3.00. This handles all the USB gubbins to ensure that you can just plug it in and treat it like a serial connection.
Finally we need to join up the pins, as below:
Finally, connect it all together and plug it into a computer:
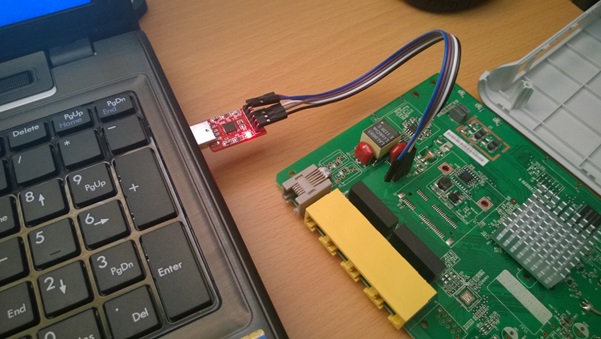
The observant may have noticed that the above circuit board isn’t the same as the previous pictures. This was my testing device, an old Sagem router which I soldered up before I thought to take photos first.
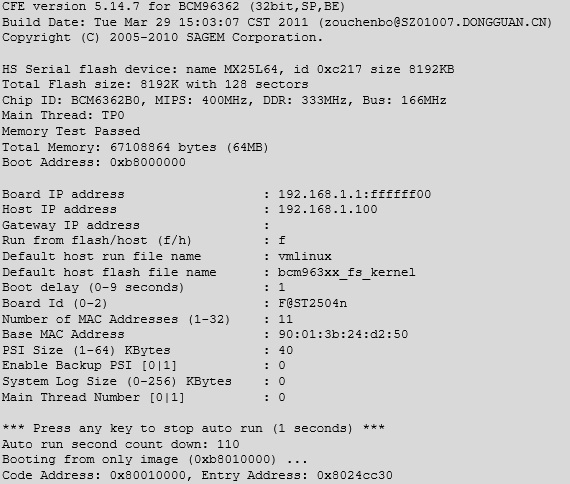
Once it’s connected we can just load up a serial console program, such as HyperTerm or minicom and watch it boot:
This could be a simple way of uploading malicious firmware to an existing router to set up a wireless sniffer, except it’s over complicated and it would be easier just to hide a small wireless device, such as a wi-fi pineapple.
But, this works for other devices, such as some mobile phones! One of my colleagues found an interesting article on how to connect to UART on a Nexus 4 via the headphone jack.
Basically if the device sees a voltage of more than 2.8V on the microphone jack it turns the connector into a UART port.
So, once again the old soldering iron is produced and a cable is made, we actually left out the resistors as they’re a safety net and not actually required (voltage from the USB to UART convertor is 3.3V, so it meets the requirements).
This time I can’t hide my lack of soldering ability:
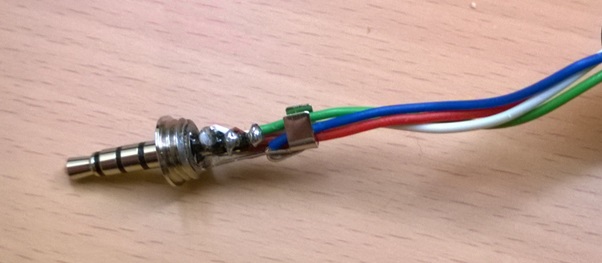
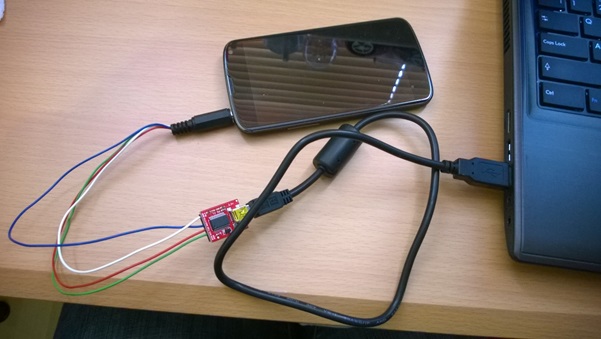
Which we can then connect to another USB to UART convertor and plug into my laptop:
And we can read the console as the device boots up:
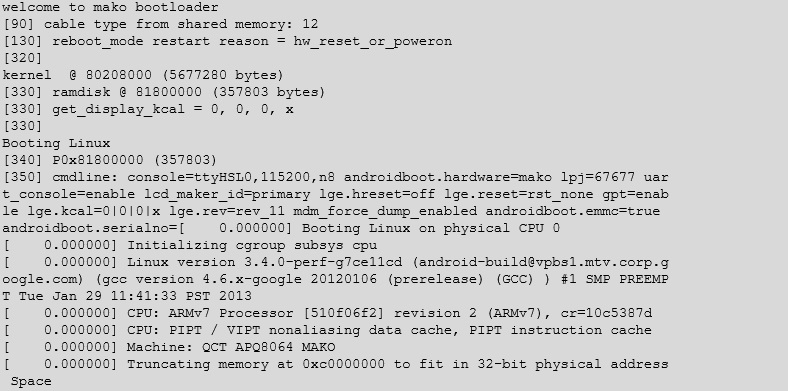
After Android has finished booting it will continuously feed out data about the hardware state of the device. You can even connect whilst the device is running.
Some phones (such as the Samsung Galaxy S2) allow two way communication through a UART connection, which can allow low level communication, such as reset the “yellow flag” which shows if an unsigned image is written to the flash memory.
In conclusion, simple hardware hacking is quite quick to perform, the greatest delays I faced were waiting for components to arrive and the longest single period of time taken was spent when my soldering iron developed a short and tripped the house electrics’.
Although there’s no immediate security risks, it can present a way in to custom devices.
https://www.pentestpartners.com/blog/how-to-hardware-hack-android-over-uart/
To make this easier the first step is to solder some header pins directly to the board, these can be seen below. Note, I’m not very good at soldering, so I won’t show the underside : )

Now we can wire this to a USB to UART module. These are quite easy to find and cheap, mine cost me less than £3.00. This handles all the USB gubbins to ensure that you can just plug it in and treat it like a serial connection.
Finally we need to join up the pins, as below:
| Purpose | Port on Router | Port on USB/UART module |
| Receive | RX | TX |
| Transmit | TX | RX |
| 3.3V power | VCC | Don’t attach |
| Ground | GND | GND |

The observant may have noticed that the above circuit board isn’t the same as the previous pictures. This was my testing device, an old Sagem router which I soldered up before I thought to take photos first.
Once it’s connected we can just load up a serial console program, such as HyperTerm or minicom and watch it boot:

This could be a simple way of uploading malicious firmware to an existing router to set up a wireless sniffer, except it’s over complicated and it would be easier just to hide a small wireless device, such as a wi-fi pineapple.
But, this works for other devices, such as some mobile phones! One of my colleagues found an interesting article on how to connect to UART on a Nexus 4 via the headphone jack.
Basically if the device sees a voltage of more than 2.8V on the microphone jack it turns the connector into a UART port.
So, once again the old soldering iron is produced and a cable is made, we actually left out the resistors as they’re a safety net and not actually required (voltage from the USB to UART convertor is 3.3V, so it meets the requirements).
This time I can’t hide my lack of soldering ability:

Which we can then connect to another USB to UART convertor and plug into my laptop:

And we can read the console as the device boots up:

After Android has finished booting it will continuously feed out data about the hardware state of the device. You can even connect whilst the device is running.
Some phones (such as the Samsung Galaxy S2) allow two way communication through a UART connection, which can allow low level communication, such as reset the “yellow flag” which shows if an unsigned image is written to the flash memory.
In conclusion, simple hardware hacking is quite quick to perform, the greatest delays I faced were waiting for components to arrive and the longest single period of time taken was spent when my soldering iron developed a short and tripped the house electrics’.
Although there’s no immediate security risks, it can present a way in to custom devices.
https://www.pentestpartners.com/blog/how-to-hardware-hack-android-over-uart/


No comments:
Post a Comment