How to use ESP8266 ESP-01 as a SENSOR web client
Posted: November 22, 2014 Filed under: Uncategorized | Tags: ES8266, LUA 77 Comments
I’m not going to explain in detail what is ESP8266 because if you have found this post I’m sure you already know it. But just in case, it is an awesome cheap board (less than 4$) with built-in wifi communication (802.11 b/g/n), and SPI, UART. You can also use its processor to run your code.
Wiring: 
Use FTDI with 3V3 output. If you face problems with this running on Windows check this link: Unbrick FTDI 232R
Burning LuaFirmware
Download Coolterm http://freeware.the-meiers.org/ (putty like app but much cooler)
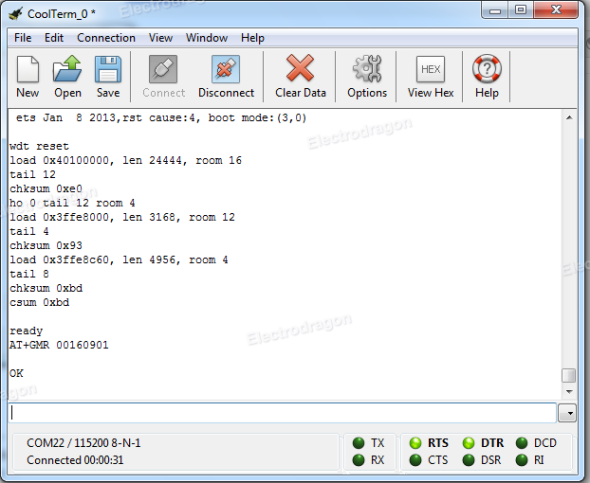
Check that your ESP8266 has some firmware through coolterm
Enter with coolterm at 115200 (most probable default speed)
Once in, type AT+GMR, my firmware was based on 00160901
Check that your ESP8266 has some firmware through coolterm
Enter with coolterm at 115200 (most probable default speed)
Once in, type AT+GMR, my firmware was based on 00160901

Congrats, you’ve got a working ESP8266 with a espressif firmware in it. If you want to play with this firmware check this out: http://www.electrodragon.com/w/Wi07c#Other_firmware
Now to burn LUA firmware:
To Burn a firmware: CH_PD pin must be always connected to HIGH and GPIO0 pin to GROUND (LOW)
To Burn a firmware: CH_PD pin must be always connected to HIGH and GPIO0 pin to GROUND (LOW)
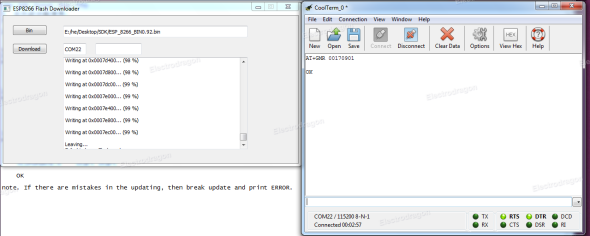
Download ESP8266 flasher: https://docs.google.com/file/d/0B3dUKfqzZnlwVGc1YnFyUjgxelE/editDownload LUA Firmware: https://github.com/nodemcu/nodemcu-firmwareExecute ESP8266_flasher.exe and burn the bin inside LUA Firmware

After burning it, GPIO0 pin should be disconnected from ground in order to reboot in normal mode. Otherwise it will be reboot in UPLOAD mode. So power it OFF, disconnect GPIO0 pin from ground… and voilà! you’ve got a ESP8266 with LUA Firmware
BasicCoding
Now with a burned LUA Firmware, we should reconfigure CoolTerm at 9600bps to be able to communicate with the board.
Connect and type this basic code to check the wifi connectivity:
Connect and type this basic code to check the wifi connectivity:
1
2
3
4
5
6
| print(wifi.sta.getip())--0.0.0.0wifi.setmode(wifi.STATION)wifi.sta.config("SSID","password")print(wifi.sta.getip())--192.168.18.110 |
Congrats, now each time you power it on back again, it will remember last wifi connection wifi setup.
Coding the automatic script
For this example we have used the following wiring:

With this basic script we will be able to know the state of a push button from the web.
Firstly we will build a LUA script named door.lua
Firstly we will build a LUA script named door.lua
So boot the terminal and type the following:
1
2
3
4
5
6
7
8
9
10
11
12
13
| file.remove(“door.lua”)file.open(“door.lua”,”w”)writeline([[srv=net.createServer(net.TCP) srv:listen(80,function(conn)]])writeline([[conn:on("receive",function(conn,payload)]])writeline([[print(node.heap())]])writeline([[door="open"]])file.writeline([[if gpio.read(8)==1 then door="OPEN" else door="CLOSED" end]])file.writeline([[conn:send("<h1> The door is " .. door ..".</h1>")]])file.writeline([[end)]])file.writeline([[conn:on("sent",function(conn) conn:close() end)]])file.writeline([[end)]])file.close()<b></b> |
After this, you will have written a door.lua script that it’s gonna be available in the ESP8266 after each power off and on.
To execute it type:
1
| dofile(“door.lua”) |
and if you don’t know the ip of ESP8266 type:
1
2
| print(wifi.sta.getip())--192.168.18.110 |
Now input the IP of the ESP8266 as a URL on your favorite browser and you will have the result you’ve been looking for!
An issue is that the script is stored on the circuit but it’s not loading automatically. To fix this, we have to modify the init.lua script. Type at console:
1
2
3
4
5
| file.remove(“init.lua”)file.open(“init.lua”,”w”)writeline([[print("Pete's LUA module 0.1")]])file.writeline([[tmr.alarm(4000, 0, function() dofile("door.lua") end )]])file.close() |
Reboot, and now each time will be automatically executing the code. Plug the esp8266 to two 1.5V battery, remove FTDI and voilà! Automatic DOOR Sensor IOT!!!
REFERENCES:
http://www.nodemcu.com/http://www.esp8266.com/http://blog.electrodragon.com/cloud-updating-your-wi07c-esp8266-now/http://scargill.wordpress.com/http://www.electrodragon.com/w/Wi07c
http://www.nodemcu.com/http://www.esp8266.com/http://blog.electrodragon.com/cloud-updating-your-wi07c-esp8266-now/http://scargill.wordpress.com/http://www.electrodragon.com/w/Wi07c
Thanks to everyone who has spend many hours developing and sharing.
Bonus
ESP8266 range test with awesome results!
Advertisements


